Configure Qlik Sense Enterprise client-managed
This section shows how to set up the default authentication configuration of Qlik Sense Enterprise client-managed for cross-domain embedding with authenticated users. If other authentication mechanisms are used, the configuration shown here may not be valid.
For public embedding without user login, see Embed analytics with anonymous access on Qlik Sense Enterprise client-managed. Anonymous access requires additional virtual proxy configuration.
To connect to Qlik Sense Enterprise client-managed with a cross-domain application the following should be configured in the Qlik Management Console:
- Navigate to “Virtual proxies” to configure the virtual proxy that will accept the connection for your embedded app. In most cases, this will be a new virtual proxy, rather than the default virtual proxy that you use for development and site management.
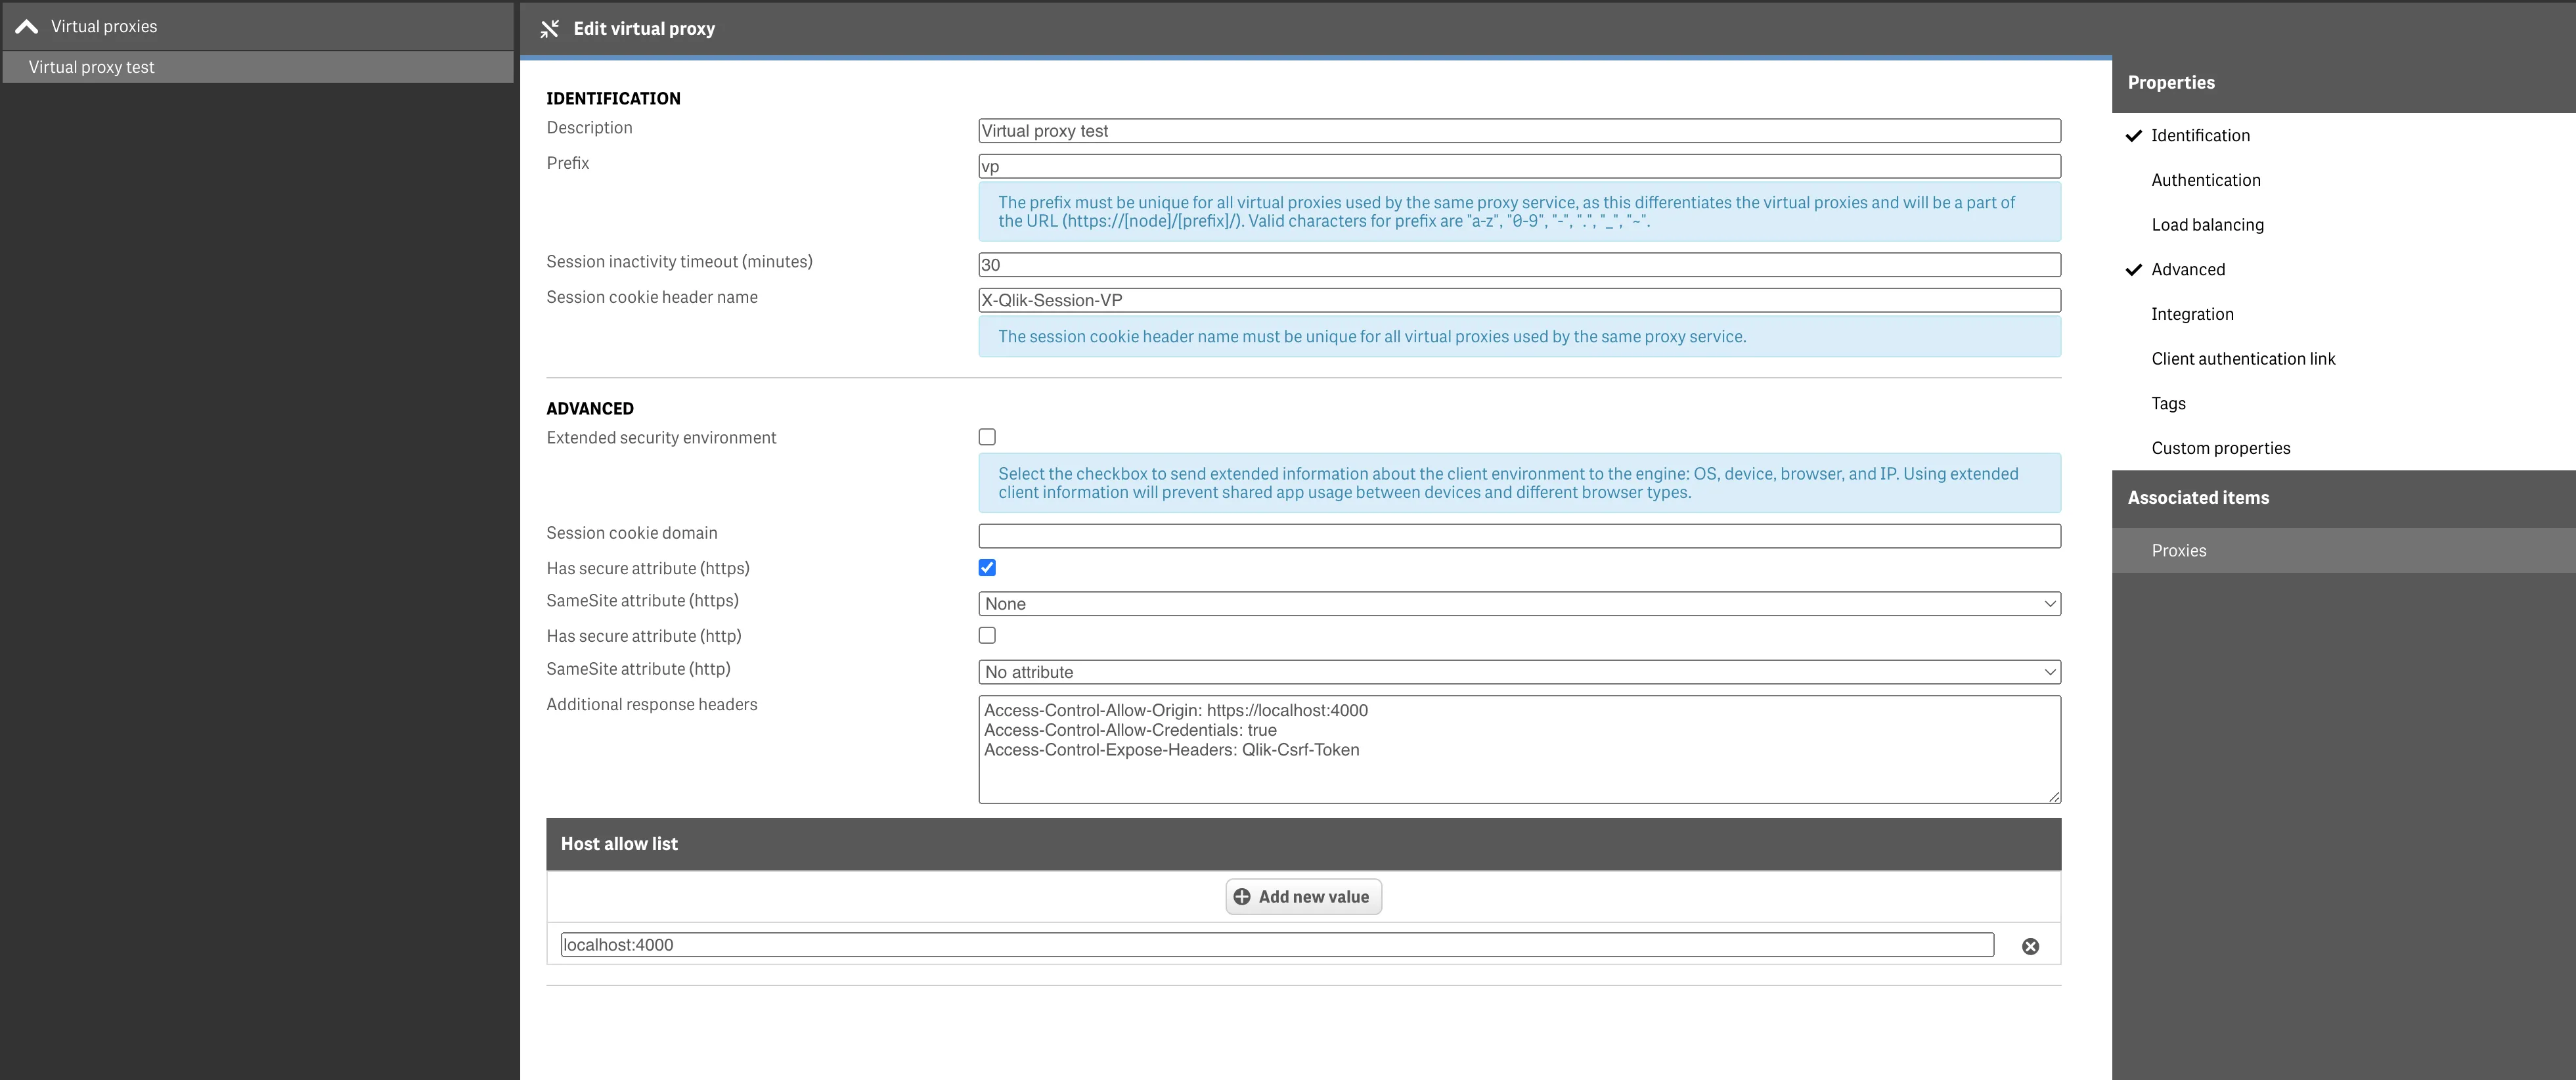
- Select “Advanced” to access the advanced settings.
- Change “SameSite attribute” (for http, https, or both) to “None” .
- Add the following headers to the “Additional response headers” section:
Access-Control-Allow-Origin: https://external-site.com <---- This is the site that connects to Qlik SenseAccess-Control-Allow-Credentials: trueAccess-Control-Expose-Headers: Qlik-Csrf-Token- Add
https://external-site.comto “Host allow list” .
When developing a third-party application that integrates with Qlik Sense, the external cross-domain site is likely from
localhost. The following image shows an example of this setup.